A successful insurance claim often starts long before settlement discussions begin. It starts with evidence. That’s why learning How to Document Hail Damage for an Insurance Claim is one of the most important steps a homeowner can take after a storm. Hail damage isn’t always obvious. Some impacts leave dramatic dents and broken materials. Others create subtle damage that may not reveal itself until months later through leaks, deterioration, or structural issues. Unfortunately, insurance companies rely heavily on documentation when evaluating claims. If evidence is incomplete, proving the full extent of damage becomes much harder.
The good news? You don’t need to be an insurance expert to create a strong claim file. With the right approach, homeowners can gather the information needed to support their claim, preserve critical evidence, and reduce the likelihood of disputes later in the process. Let’s walk through the process step by step.
Understanding Why Documentation Matters
Insurance companies make decisions based on evidence. When an adjuster reviews a claim, they aren’t evaluating what might have happened. They’re evaluating what can be demonstrated through documentation.
This is why How to Document Hail Damage for an Insurance Claim becomes such a valuable skill. Good documentation creates a clear record of:
- The storm event
- The condition of the property
- The extent of damage
- Associated expenses
- Repair requirements
Without documentation, important damage can be overlooked.
Common Reasons Hail Claims Encounter Problems
Several issues frequently appear in disputed claims:
| Problem | Potential Consequence |
|---|---|
| Poor photos | Damage may be questioned |
| Missing inspection reports | Scope disagreements |
| No weather documentation | Storm verification issues |
| Incomplete records | Reduced claim support |
| Delayed reporting | Coverage complications |
Even when damage is legitimate, insufficient documentation can make claim resolution more difficult.
Why Timing Matters
Time works against evidence. Water stains spread. Damaged materials deteriorate. Temporary repairs alter original conditions. Photographs become harder to obtain. The sooner documentation begins, the stronger the claim file typically becomes.
Step 1: Prioritize Safety Before Inspecting Damage
Many homeowners make the same mistake after a severe hailstorm. They immediately climb onto the roof. Don’t. A damaged roof can become dangerous without warning. Loose shingles, wet surfaces, hidden structural weaknesses, and compromised decking create serious risks. Instead, begin with a safe ground-level inspection.
Look for Immediate Hazards
Check for:
- Downed power lines
- Broken glass
- Fallen tree limbs
- Exposed electrical equipment
- Structural instability
If any of these hazards exist, contact appropriate professionals before proceeding.
Prevent Additional Damage
Insurance policies often require homeowners to take reasonable steps to prevent further loss.
This may include:
- Tarping exposed roof areas
- Removing standing water
- Covering broken windows
- Protecting vulnerable personal property
Document these emergency actions carefully. Take photographs before and after temporary repairs whenever possible.
Step 2: Document the Hailstorm Itself
Many homeowners focus entirely on property damage. That makes sense. However, documenting the storm itself can also strengthen a claim.
Record Key Storm Information
Immediately record:
- Date of storm
- Approximate time
- Storm duration
- Observed hail size
- Wind conditions
- Rain intensity
Create a simple storm journal. Even basic notes may become valuable later.
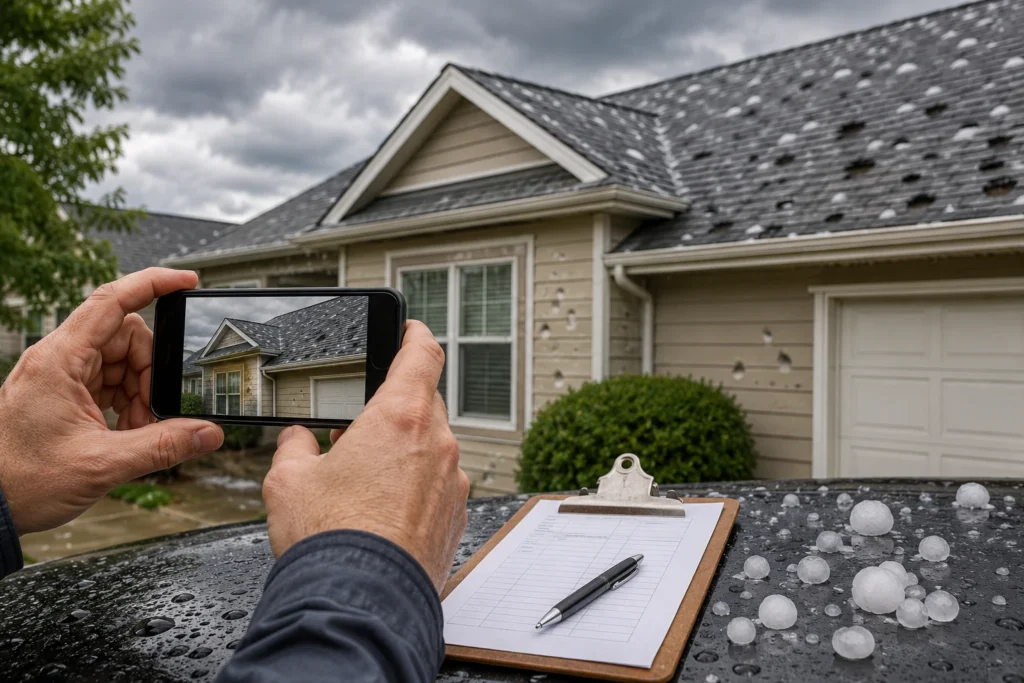
Photograph Hailstones
If conditions allow, take photographs while hail remains visible.
Use common objects for scale:
- Quarter
- Golf ball
- Baseball
- Measuring tape
The goal is demonstrating hail size accurately. Multiple photographs from different angles provide stronger evidence.
Gather Weather Verification
Reliable weather records may support claim documentation.
Sources can include:
- National Weather Service reports
- Local weather stations
- Meteorological databases
- News coverage
Interestingly, weather analysis often involves complex modeling systems that resemble concepts used in fields like Computational Fluid Dynamics, where scientists study fluid movement and atmospheric behavior to better understand storm development. Supporting weather data helps establish that a significant hail event occurred in the area.
Step 3: Take Comprehensive Exterior Photos

Photos often become the backbone of a claim. Not a few photos. Hundreds. The goal is creating a complete visual record of the property.
Start With Wide-Angle Views
Before focusing on individual damage points, photograph:
- Front elevation
- Rear elevation
- Side elevations
- Entire roofline
- Driveways
- Detached structures
These images establish context.
Document Roof Damage Safely
Roof damage may include:
- Bruised shingles
- Granule loss
- Cracked shingles
- Fractured tiles
- Exposed substrate
If roof access is unsafe, use:
- Zoom photography
- Drone imaging
- Professional inspections
Never compromise safety for photographs.
Capture Gutter Damage
Gutters frequently provide some of the clearest evidence of hail impacts.
Photograph:
- Dents
- Impact marks
- Paint damage
- Bent sections
- Downspout damage
Use close-up images combined with wider context photos.
Inspect Siding Carefully
Hail affects many siding materials differently.
Look for:
- Cracks
- Splits
- Chips
- Surface bruising
- Color disruption
Document each area separately.
Examine Exterior Fixtures
Many claims overlook damage to secondary components.
Inspect:
- Mailboxes
- Outdoor lighting
- Fences
- Garage doors
- Deck railings
- Air conditioning units
These items can provide valuable supporting evidence of hail severity.
Step 4: Document Interior Damage
Not all hail damage stays outside. In fact, some of the most expensive losses occur inside the home.
Check Ceilings for Water Intrusion
Look for:
- Brown stains
- Yellow discoloration
- Peeling paint
- Sagging drywall
Even minor staining may indicate roof penetration. Photograph everything.
Inspect the Attic
Attics often reveal damage before living spaces do.
Look for:
- Wet insulation
- Water trails
- Damp wood
- Mold growth
- Active leaks
Use proper lighting and photograph findings clearly.
Examine Walls and Flooring
Water frequently travels. The visible stain isn’t always directly below the roof damage.
Inspect:
- Baseboards
- Hardwood flooring
- Carpet
- Vinyl flooring
- Interior walls
Document any abnormal conditions.
Create a Room-by-Room Inventory
Organization matters. Consider using a simple chart.
| Room | Damage Observed | Photo Numbers |
|---|---|---|
| Living Room | Ceiling stain | IMG001-005 |
| Kitchen | Drywall discoloration | IMG006-009 |
| Bedroom | Carpet moisture | IMG010-015 |
This approach keeps evidence organized and easier to reference later.
Step 5: Record Video Evidence
Photos capture moments. Videos capture context. Both have value. A well-documented video walkthrough can strengthen your claim considerably.
Perform a Full Property Walkthrough
Move slowly.
Record:
- Exterior elevations
- Roofline views
- Damaged siding
- Gutters
- Windows
- Interior damage
Narrate observations as you record.
For example:
“This is the south-facing roof slope. Visible impact marks appear along multiple shingles.”
Simple narration provides useful context.
Avoid Common Video Mistakes
Avoid:
- Fast camera movement
- Poor lighting
- Excessive zooming
- Incomplete coverage
The goal is clarity, not production quality.
Step 6: Create a Detailed Damage Inventory
Now it’s time to organize everything. This step often separates strong claims from weak ones.
Build a Master Damage List
List every damaged item. Nothing is too small.
Your inventory may include:
| Property Component | Damage Type |
|---|---|
| Roof | Impact damage |
| Gutters | Denting |
| Siding | Cracking |
| Screens | Tears |
| Fence | Surface damage |
| HVAC Unit | Fin damage |
Each entry should reference supporting photos.
Include Personal Property
Hail events occasionally damage personal belongings.
Examples include:
- Patio furniture
- Grills
- Outdoor electronics
- Vehicles
- Decorative fixtures
Document all affected items thoroughly.
Organize Supporting Evidence
Create folders for:
- Exterior photos
- Interior photos
- Videos
- Receipts
- Weather reports
- Inspection reports
Good organization reduces confusion later during the claim process.
Step 7: Save Every Receipt and Expense
Many homeowners focus exclusively on physical damage. That’s understandable. However, claim-related expenses can also become important.
Track Emergency Costs
Potential expenses include:
- Roof tarping
- Water extraction
- Debris removal
- Temporary repairs
Save every receipt. Every invoice. Every work order.
Record Additional Living Expenses
If severe damage forces temporary relocation, maintain records for:
- Hotels
- Meals
- Transportation
- Temporary housing
Depending on policy terms, these expenses may be relevant.
Build an Expense Log
A simple spreadsheet works well.
| Date | Expense | Amount |
|---|---|---|
| May 10 | Roof Tarp | $450 |
| May 11 | Water Mitigation | $1,200 |
| May 12 | Hotel Stay | $180 |
The more organized the records, the easier they become to review later.
Step 8: Maintain a Complete Communication Log
One of the most overlooked parts of How to Document Hail Damage for an Insurance Claim has nothing to do with photographs. It’s communication. Every phone call, email, text message, letter, and meeting related to the claim should be recorded.
Why? Because claim disputes often involve misunderstandings about what was discussed, promised, or requested.
What to Record
Track:
- Date and time
- Name of person contacted
- Company represented
- Summary of discussion
- Follow-up actions
A simple communication log can save hours of frustration later.
| Date | Contact | Discussion | Follow-Up |
|---|---|---|---|
| May 15 | Insurance Adjuster | Scheduled inspection | Confirm appointment |
| May 18 | Roofing Contractor | Reviewed roof damage | Await report |
| May 20 | Insurance Representative | Requested documents | Send photos |
Save All Written Correspondence
Create separate folders for:
- Emails
- Claim letters
- Inspection notices
- Coverage explanations
- Repair estimates
Avoid deleting anything until the claim is fully resolved. Even minor correspondence may become important later.
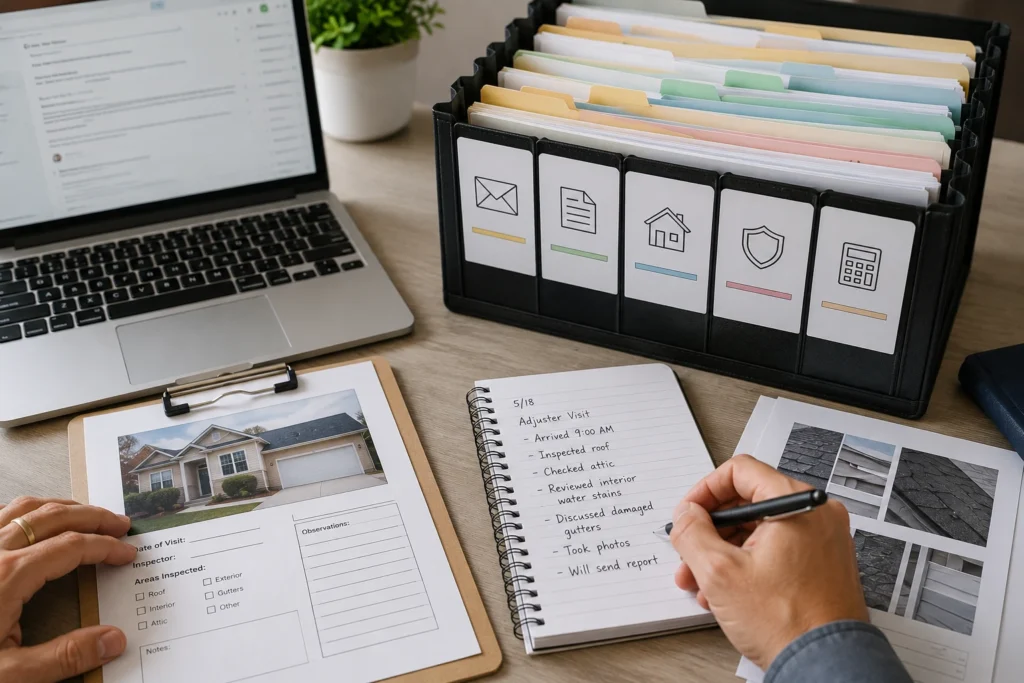
Document Adjuster Visits
Whenever an adjuster visits the property:
- Record the inspection date
- Note areas inspected
- Write down observations discussed
- Save any paperwork provided
The more complete your records, the easier it becomes to reconstruct the claim timeline.
Step 9: Obtain Professional Inspection Reports
Homeowners can gather valuable evidence themselves. However, professional inspections often reveal damage that is not visible from the ground. This is especially true for roofing systems.
Why Independent Inspections Matter
Insurance inspections are important, but they represent only one evaluation.
Independent inspections can provide additional documentation regarding:
- Roof impacts
- Shingle damage
- Flashing damage
- Vent damage
- Gutter impacts
- Structural concerns
These reports often include photographs, measurements, and written findings.
What a Quality Inspection Report Should Include
Look for reports containing:
- Date of inspection
- Property address
- Inspector credentials
- Damage descriptions
- Supporting photographs
- Repair recommendations
A vague report has limited value. Detailed reports tend to provide stronger support.
Compare Findings Carefully
Sometimes inspection findings align perfectly. Sometimes they don’t. If multiple inspections identify different damage scopes, understanding those differences becomes important before accepting any settlement.
Why Homeowners in Richardson Often Seek Independent Documentation
Severe hail events can affect properties differently, even within the same neighborhood. For that reason, many property owners in Richardson obtain independent inspections before making major claim decisions. Additional documentation helps ensure that damage is thoroughly evaluated rather than relying on a single perspective.
Step 10: Organize a Complete Claim Package
At this point, you’ve gathered a substantial amount of information. Now it’s time to assemble everything into a single organized package. Think of it as building the story of the claim. The easier it is to follow, the easier it becomes for others to evaluate.
Essential Claim Documents Checklist
A complete file often includes:
- Storm timeline
- Weather documentation
- Exterior photographs
- Interior photographs
- Video walkthroughs
- Inspection reports
- Repair estimates
- Expense receipts
- Communication logs
- Insurance correspondence
Recommended Digital Folder Structure
Many homeowners find it helpful to organize files like this:
Hail Claim Folder
- Photos
- Videos
- Weather Reports
- Inspection Reports
- Estimates
- Receipts
- Insurance Documents
- Communications
Simple organization can prevent major headaches later.
Create Backup Copies
Technology fails. Phones break. Hard drives crash. Files disappear. Always maintain multiple backups.
Options include:
- Cloud storage
- External hard drives
- USB drives
- Email archives
Redundancy protects valuable evidence.
Common Documentation Mistakes That Hurt Hail Claims
Even legitimate claims can face challenges when documentation is weak. Let’s look at several common mistakes.
Waiting Too Long
This may be the biggest mistake of all. Damage changes over time. Evidence deteriorates. Memories fade. Documentation should begin as soon as conditions are safe.
Taking Too Few Photos
Five photographs rarely tell the complete story. Take wide-angle shots. Take close-ups. Take photos from multiple directions. Then take more. Storage space is cheap. Missing evidence is expensive.
Ignoring Secondary Damage
Many homeowners focus exclusively on the roof. That’s understandable.
However, hail can damage:
- Gutters
- Siding
- Windows
- Screens
- HVAC systems
- Fencing
- Exterior fixtures
Comprehensive documentation means documenting everything.
Throwing Away Damaged Materials
Don’t discard damaged materials prematurely. If shingles, siding, screens, or other components are removed during emergency repairs, photograph them thoroughly before disposal. In some cases, retaining samples may be beneficial.
Failing to Keep Records Organized
Good evidence loses value when nobody can find it. Maintain a system from day one. Future you will be grateful.
What Happens After Documentation Is Complete?
Once documentation is assembled, the claim process moves into evaluation.
Filing the Claim
The homeowner typically submits:
- Claim information
- Supporting evidence
- Photographs
- Inspection reports
- Repair estimates
The insurance company then begins its review.
The Property Inspection
Most claims involve an inspection.
During this visit, the adjuster evaluates:
- Roof condition
- Exterior damage
- Interior damage
- Storm-related impacts
- Repair requirements
Having documentation available during this stage can be extremely helpful.
Estimate Preparation
Following the inspection, an estimate is often prepared outlining repair costs.
This estimate may include:
| Category | Possible Repairs |
|---|---|
| Roofing | Shingle replacement |
| Gutters | Dent repairs |
| Siding | Panel replacement |
| Interior | Water damage repairs |
| HVAC | Component repairs |
The estimate becomes a central part of the claim review process.
Reviewing Settlement Offers
Many homeowners assume the first settlement offer automatically reflects all damage. That assumption can create problems.
Carefully compare:
- Inspection findings
- Repair estimates
- Supporting documentation
- Settlement calculations
Questions should be addressed before accepting a settlement.
Challenges Homeowners Sometimes Face in Richardson
Property owners in Richardson occasionally encounter issues such as:
- Missing damage items
- Scope disagreements
- Repair pricing disputes
- Documentation questions
This is why thorough evidence gathering remains so important throughout the process.
When Professional Claim Assistance May Be Helpful
Documentation is valuable. But documentation alone does not always eliminate disputes. Some claims become more complicated than expected.
Signs Additional Assistance May Be Needed
Examples include:
- Extensive roof damage
- Large losses
- Multiple damaged structures
- Water intrusion issues
- Disputed repair scopes
- Settlement disagreements
Complex claims often require closer review.
Large Hail Losses
A severe storm can affect:
- Roofing systems
- Exterior surfaces
- Windows
- HVAC equipment
- Interior finishes
When numerous building components are involved, documentation requirements expand significantly.
Underpaid or Disputed Claims
Sometimes disagreements arise regarding:
- Extent of damage
- Repair methods
- Material pricing
- Replacement requirements
Comprehensive documentation often becomes one of the strongest tools available when addressing these concerns.
The Role Documentation Plays Throughout the Claim
Whether a homeowner handles the claim independently or seeks assistance, documentation remains the foundation. Photos. Reports. Receipts. Videos. Communication records. Together, they create the evidence needed to support the claim.
Understanding the Importance of a Hail Damage Roof Insurance Claim
Roof systems often receive the most attention after a hailstorm. For good reason. The roof serves as the home’s primary defense against weather. When preparing a Hail Damage Roof Insurance Claim, documentation should include far more than photographs of shingles alone.
A strong claim file may also contain:
- Roof inspection reports
- Vent and flashing documentation
- Attic moisture evidence
- Weather records
- Repair estimates
- Maintenance records
The more complete the evidence, the clearer the overall picture becomes.
Final Thoughts
Learning How to Document Hail Damage for an Insurance Claim is one of the smartest steps a homeowner can take after a severe storm. Good documentation protects evidence. It preserves facts. It creates a clear record of what occurred and how the property was affected. Most importantly, it allows claim decisions to be based on documented conditions rather than assumptions.
Start early. Stay organized. Photograph everything. Save every receipt. Maintain detailed records. And keep backups of all important files. For homeowners facing hail damage, those simple actions can make a significant difference throughout the claim process. When it comes to How to Document Hail Damage for an Insurance Claim, preparation is rarely wasted. Strong documentation creates stronger claims, clearer communication, and a better foundation for moving forward after the storm.
FAQs
You should begin documenting damage as soon as it is safe to do so. Early documentation helps preserve evidence before conditions change.
Take wide-angle and close-up photos of the roof, gutters, siding, windows, HVAC equipment, and any interior water damage.
You can perform a ground-level inspection, but avoid climbing onto the roof if it may be unsafe. Professional inspections are often recommended.
Yes. Save receipts for tarping, water mitigation, debris removal, and any emergency repairs related to the storm damage.
Weather reports help verify that a hail event occurred in your area and can support the timeline of your claim.
A damage inventory should list all affected property components, the type of damage observed, and corresponding photo references.
Yes. Video walkthroughs provide context and can help document the overall condition of the property after the storm.
Additional damage may be discovered later through professional inspections. Continue documenting new findings as they are identified.
Keep all claim records until the claim is fully resolved and repairs are completed. Retaining copies afterward is also a good practice.
Yes. Incomplete or unclear documentation can make it harder to demonstrate the full extent of hail damage and support repair costs.